Tutorial 2: Adding formatting to the XLSX File
In the previous section we created a simple spreadsheet using Lua and the
xlsxwriter module.
This converted the required data into an Excel file but it looked a little bare. In order to make the information clearer we would like to add some simple formatting, like this:
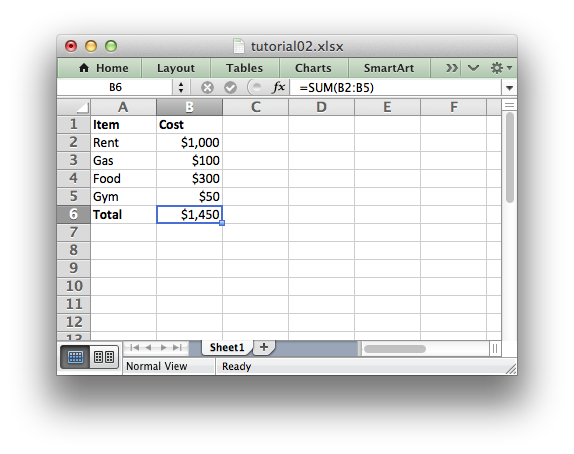
The differences here are that we have added Item and Cost column headers in a bold font, we have formatted the currency in the second column and we have made the Total string bold.
To do this we can extend our program as follows:
(The significant changes are shown with a red line.)
 local Workbook = require "xlsxwriter.workbook"


 -- Create a workbook and add a worksheet.
 local workbook  = Workbook:new("Expensese02.xlsx")
 local worksheet = workbook:add_worksheet()

 -- Add a bold format to use to highlight cells.
 local bold = workbook:add_format({bold = true})

 -- Add a number format for cells with money.
 local money = workbook:add_format({num_format = "$#,##0"})

 -- Write some data header.
 worksheet:write("A1", "Item", bold)
 worksheet:write("B1", "Cost", bold)

 -- Some data we want to write to the worksheet.
 local expenses = {
   {"Rent", 1000},
   {"Gas",   100},
   {"Food",  300},
   {"Gym",    50},
 }

 -- Start from the first cell below the headers.
 local row = 1
 local col = 0

 -- Iterate over the data and write it out element by element.
 for _, expense in ipairs(expenses) do
   local item, cost = unpack(expense)
   worksheet:write(row, col,     item)
   worksheet:write(row, col + 1, cost, money)
   row = row + 1
 end

 -- Write a total using a formula.
 worksheet:write(row, 0, "Total",       bold)
 worksheet:write(row, 1, "=SUM(B2:B5)", money)

 workbook:close()
The main difference between this and the previous program is that we have added two Format objects that we can use to format cells in the spreadsheet.
Format objects represent all of the formatting properties that can be applied to a cell in Excel such as fonts, number formatting, colors and borders. This is explained in more detail in The Format Class and Working with Formats.
For now we will avoid getting into the details and just use a limited amount of the format functionality to add some simple formatting:
-- Add a bold format to use to highlight cells.
local bold = workbook:add_format({bold = true})

-- Add a number format for cells with money.
local money = workbook:add_format({num_format = "$#,##0"})
We can then pass these formats as an optional third parameter to the
worksheet.write() method to format the data in the
cell:
write(row, column, token, [format])
Like this:
worksheet:write(row, 0, "Total", bold)
Which leads us to another new feature in this program. To add the headers in
the first row of the worksheet we used write() like this:
worksheet:write("A1", "Item", bold)
worksheet:write("B1", "Cost", bold)
So, instead of (row, col) we used the Excel "A1" style notation. See
Working with Cell Notation for more details but don’t be too concerned about it for
now. It is just a little syntactic sugar to help with laying out worksheets.
In the next section we will look at handling more data types.